Easy Fix: This PC can’t run Windows 11 (Bypass TPM and Secure Boot)

how to fix the error This PC can’t run Windows 11 with the easiest method possible of bypassing the TPM and Secure Boot checks in the Windows 11 setup.

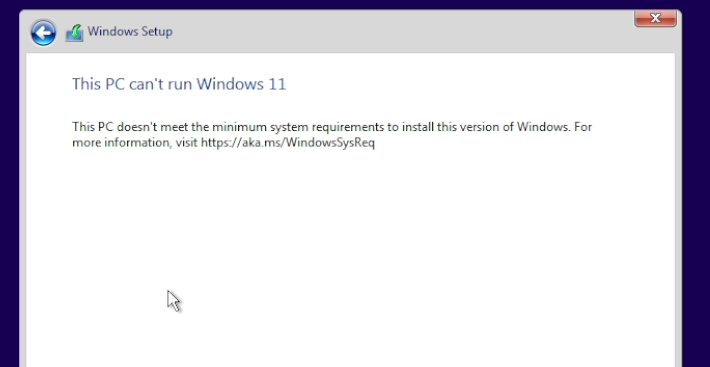
Normally, when you try to install Windows 11 on an unsupported machine, you will receive the following error, which is This PC can’t run Windows 11. This won’t allow you to continue with the setup and the only option would be to cancel the setup.


To bypass this, in the easiest method possible, just go back to where the setup let’s you click on the back button.

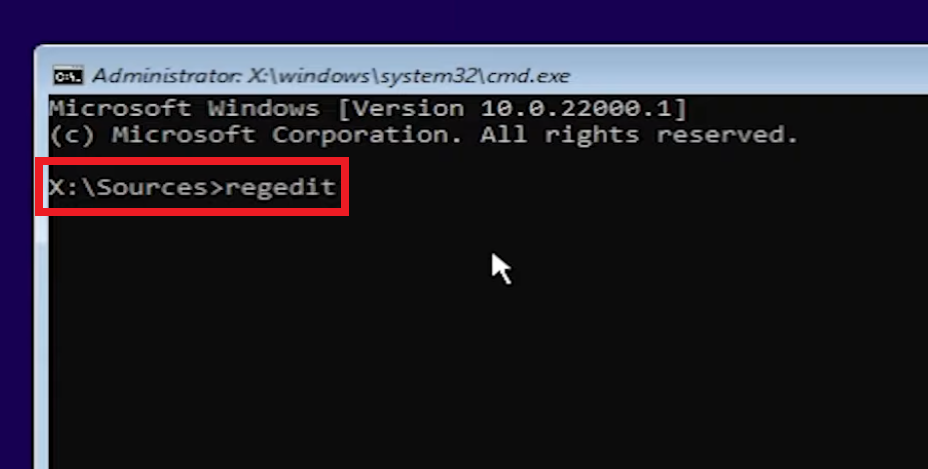
Press the keyboard combination Shift+F10 to open the command prompt in the Windows 11 setup. In the command prompt type regedit, to open the Registry Editor.

In the Registry Editor, go to the following location:

HKEY_LOCAL_MACHINE - SYSTEM - Setup

Right click on Setup and then click on New and then Key. Name the new key, LabConfig.

Double click on LabConfig, and then right click in an empty space, New and then DWORD (32-bit) Value.

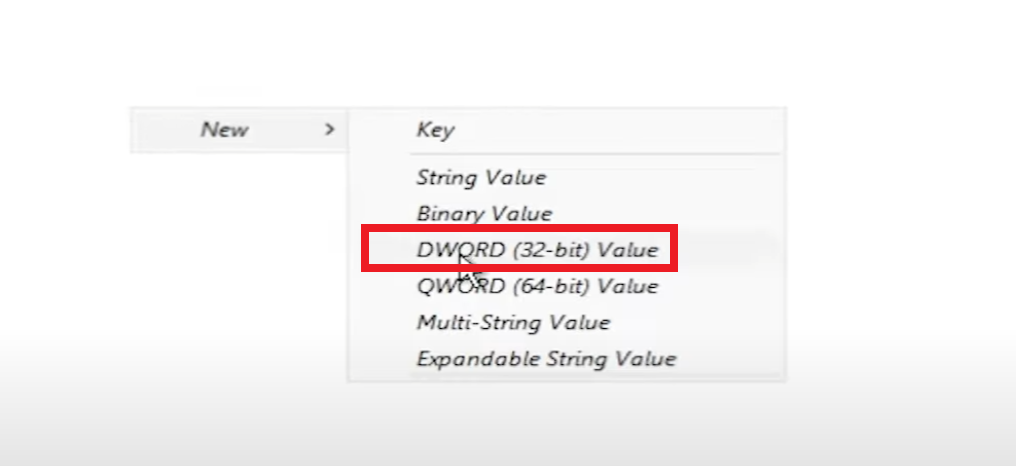
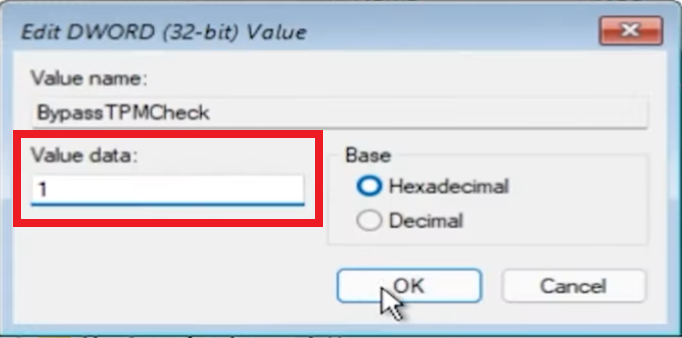
Create 2 new values, named BypassTPMCheck and the other one BypassSecureBootCheck.

Double click on each value, and then change their value data to 1.

You can now close every window and continue with the Windows 11 setup. The installer will be the same, but you won’t be bothered by any other errors.

Speedup Stable diffusion model Loading time

A1111 Webui

webui-user.bat
set COMMANDLINE_ARGS= --xformers --no-hashing --opt-channelslast --no-download-sd-model --lowram
set SAFETENSORS_FAST_GPU=1

stable-diffusion-webui/modules/sd_models.py
Switch
pl_sd = safetensors.torch.load_file(checkpoint_file, device=device)
by
pl_sd = safetensors.torch.load(open(checkpoint_file, 'rb').read())

pl_sd = safetensors.torch.load(open(checkpoint_file, 'rb').read())
pl_sd = {k: v.to(device) for k, v in pl_sd.items()}

Comfyui

Comfyui/Comfyui/comfy/utils.pyreplacing
sd = safetensors.torch.load_file(ckpt, device=device.type)
by
sd = safetensors.torch.load(open(ckpt, 'rb').read())

It will increased the speed from the HDD x6 times, from 15M/s to 200MB/s

Google Gemma

Download ollama Client: 【Click Here

普通7B版 安装指令:(适合8G显存)

ollama run gemma:7b

如果你是第一次部署,它会自动下载!

7B的全量版本:(需要16G左右的显存)

ollama run gemma:7b-instruct-fp16

2B轻量版:(适合CPU会低配电脑安装)

ollama run gemma:2b

ModelParametersSizeDownload
Llama 27B3.8GBollama run llama2
Mistral7B4.1GBollama run mistral
Dolphin Phi2.7B1.6GBollama run dolphin-phi
Phi-22.7B1.7GBollama run phi
Neural Chat7B4.1GBollama run neural-chat
Starling7B4.1GBollama run starling-lm
Code Llama7B3.8GBollama run codellama
Llama 2 Uncensored7B3.8GBollama run llama2-uncensored
Llama 2 13B13B7.3GBollama run llama2:13b
Llama 2 70B70B39GBollama run llama2:70b
Orca Mini3B1.9GBollama run orca-mini
Vicuna7B3.8GBollama run vicuna
LLaVA7B4.5GBollama run llava
Gemma2B1.4GBollama run gemma:2b
Gemma7B4.8GBollama run gemma:7b

huggingFace

https://huggingface.co/chat

Setting custom filenames in Stable Diffusion – Comfyui and Automatic1111 webui

The Stable Diffusion ComfyUI is a powerful GUI for AI image generation, but it’s also known for its limited documentation and steep learning curve for automatic1111 users.

By default, ComfyUI generated images will be dumped in the output folder with the meaningless filename ComfyUI_00001_.png with increasing numbers.

Continue reading “Setting custom filenames in Stable Diffusion – Comfyui and Automatic1111 webui”

ComfyUI shortcuts – speed up your workflow:

ShortcutExplanation
Ctrl+EnterQueue up current graph for generation
Ctrl+Shift+EnterQueue up current graph as first for generation
Ctrl+SSave workflow
Ctrl+OLoad workflow
Ctrl+ASelect all nodes
Ctrl+MMute/unmute selected nodes
DelDelete selected nodes
BackspaceDelete selected nodes
Ctrl+DelDelete the current graph
Ctrl+BackspaceDelete the current graph
SpaceMove the canvas around when held and moving the cursor
Ctrl+Left ButtonAdd clicked node to selection
Shift+Left ButtonAdd clicked node to selection
Ctrl+CCopy selected nodes
Ctrl+VPaste selected nodes while severing connections
Ctrl+Shift+VPaste selected nodes while maintaining incoming connections
Shift+Left ButtonHold and drag to move multiple selected nodes at the same time
Ctrl+DLoad default graph
QToggle visibility of the queue
HToggle visibility of history
RRefresh graph
2 X Left ButtonDouble click to open node quick search palette
Right ButtonOpen node menu

Keyboard shortcuts for Windows 10 and 11

Most users are familiar with using their computer with a keyboard and mouse. After all, this is the most intuitive method for most people. The mouse makes it easy to know what you’re pointing at, selecting, and clicking, so even first-timers don’t take too long to get the hang of it. But for proficient users, the keyboard can be a much more powerful tool, and it allows you to get things done faster. That’s why there are a ton of keyboard shortcuts in Windows 11 that help with exactly that, and we’ve compiled a list of them to help you out.

Continue reading “Keyboard shortcuts for Windows 10 and 11”

How to share model and settings when multiple sets of Stable Diffusion

I have three sets of Stable Diffusion ui installed on my computer:

  • a1111 webui
  • comfyui
  • 秋叶整合包( An integrated package of SD webui)

There are a bunch of large models, LoRA, ControlNet, plus some VAE, upscale enlargement models, etc. The ones I commonly use are about 90G. Copying three copies takes up a lot of space, and updating the version is also troublesome.

You can put all the models in one location, and then specify the model location for each SD UI.

There are usually two methods:
Mklink and Command line parameters.

1. Mklink (symbolic link)

It is similar to a folder pointer or shortcut, which allows the model folders of each SD UI, such as models, to point to the same centrally stored model folder.

Example, use mklink to create a symbolic link to point the A directory on the C drive to the B directory on the D drive:

mklink /d C:\XXX\A D:\XXX\B

Microsoft mklink documentation:

https://learn.microsoft.com/zh-cn/windows-server/administration/windows-commands/mklink

For example my model folder is:

D:\ai\models\sd\webui_using

Some commonly used model files are classified under this folder:

Continue reading “How to share model and settings when multiple sets of Stable Diffusion”

Duplicate file or floder x times with command Line

ometimes there might be a need to make multiple copies of the same file. Normally in order to make a copy of a file, one would have to open the file and click “Save As” on the Menu to the save the file in a different name. The key to having multiple copies of a file is to make sure that each file is named differently otherwise they will overlap.

Fortunately this can be done quite easily by writing some commands on the Command prompt of Windows.

Steps

  1. Create a Folder where you want to save the files.
  2. Save the File in the Folder for which you want to make multiple copies.
  3. Name the File as “cat” . For Example cat.jpg
  4. Open the Command Prompt withe CMD
  5. Change your directory to the location of the folder
  6. And then type this command
for /l %f in (1,1,5) do copy cat.pdf cat%f.pdf

On the command above “5” is the number of copies to be made. Substitute that with the number of copies you would actually need.

This is how it appears Initially. There is a Text Document named “1” on a folder.