How to Fix VPN Error ” A Connection To The Remote Computer Could Not Be Established” In Windows 10

We generally use a VPN for office networks or to establish an increasingly secure connection with the internet. While setting up a VPN connection is a breeze, there can also be problems associated with it. Many users experience an error while connecting to a VPN network (which had worked earlier) saying, “A connection to the remote computer could not be established. You might need to change the network settings for this connection.”

If you are also experiencing this error, nothing to worry as this can fixed easily. Let’s see how.

Solution 1 : Using Device Manager

Step 1: Press the Windows key + X together on your keyboard and select Device Manager from the context menu.

Step 2: In the Device Manager window, scroll down and expand Network adapters. Now, right-click on WAN Miniport (SSTP) and select Uninstall device from the menu.

Step 3: Repeat the same process as shown in Step 2 to Uninstall device for the all the Miniports listed below one by one

  • WAN Miniport (PPTP)
  • WAN Miniport (PPPOE)
  • WAN Miniport (Network Monitor)
  • WAN Miniport (L2TP)
  • WAN Miniport (IPv6)
  • WAN Miniport (IP)
  • WAN Miniport (IKEv2)

Step 4: Now, click on the Action tab at the top of the window and select Scan for hardware changes from the context menu. This will re-install all the WAN Miniports again as it was earlier. So, basically, it installs them freshly and now your VPN should work back again.

Solution 2 : Disable Proxy

1. Press Windows key + R to open run command box.

2. Write inetcpl.cpl in it and click OK.

3. Click on Connections Tab from the top tab list.

4. Now, click on LAN Settings.

5. Make sure that Use a Proxy server for your LAN is unchecked.
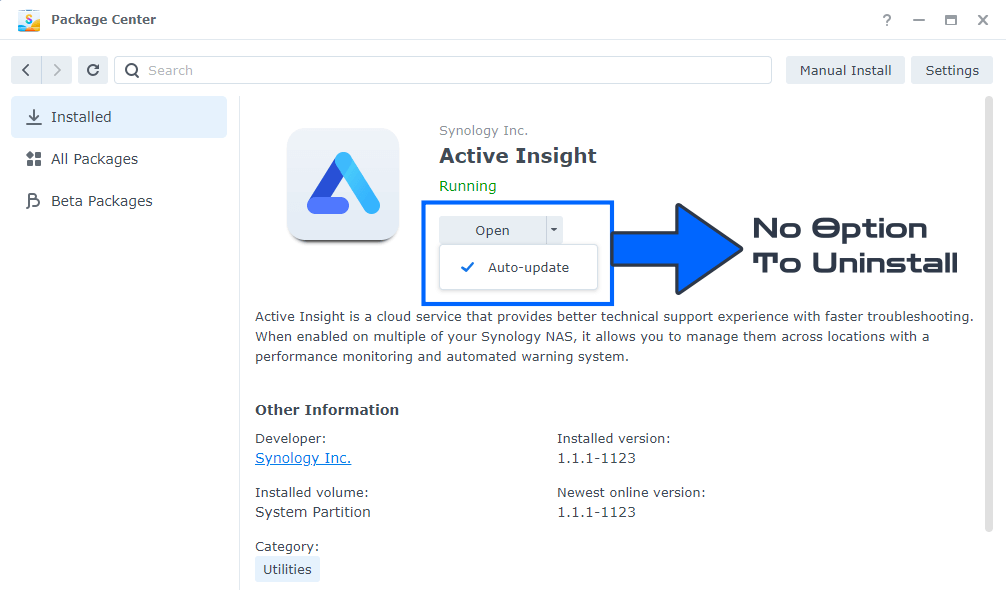
How to Delete Active Insight – Synology DSM

Have you happened to notice that you can’t delete Active Insight from Synology Package Center? If, for one reason or another, you are not interested in the service and you want to have nothing to do with Active Insight, today I will teach you how to permanently delete it from your NAS. Remember, even if you delete the Active Insight package, if you change your mind, you can always easily reinstall it with just one click directly from Synology’s Package Center. What is Active Insight? Active Insight is a cloud service that provides a superior technical support experience with fast troubleshooting. When enabled on multiple Synology NAS devices, it allows you to manage all of them across locations with a performance monitoring and automated warning system. So, to recap: how to uninstall Active Insight? Check out the steps below for the how-to guide.

Active Insight Remove Delete Uninstall Synology NAS 1

Continue reading “How to Delete Active Insight – Synology DSM”

How to Enabling DNS over HTTPS (DoH)

DNS over HTTPS (DoH) support appeared on Windows 10 2004 build (May 2020 Update). Now Windows 10 can resolve names over HTTPS protocol using the built-in DoH client. In this article we’ll tell what DNS over HTTPS protocol is used for, how to enable and use it on latest Windows 10 builds.

When your computer connects to a DNS server to resolve names, it sends and receives DNS requests/responses over the Internet in clear text. An attacker can intercept your traffic, detect what resources you have visited or manipulate your DNS traffic using a man-in-the-middle type of attack. The DNS over HTTPS protects user data privacy by encrypting all DNS queries. The DoH protocol encapsulates DNS queries into HTTPS traffic and sends them to a DNS server (you need use use a special DNS server with DoH support).

Windows 10 2004 does’t yet have a GPO parameter or an option in the graphic interface to enable DNS-over-HTTPS. Currently, you can only enable DoH on latest Windows 10 builds via the registry:

  1. Run the regedit.exe;
  2. Go to the registry key HKEY_LOCAL_MACHINE\SYSTEM\CurrentControlSet\Services\Dnscache\Parameters
  3. Create a new DWORD parameter with the name EnableAutoDoh and value 2;
    windows 10 enable dns over https via registry parameter EnableAutoDoh
  4. Then restart the DNS client service. To do it, reboot your computer, since you won’t be able to restart the dnscase service normally (Restart-Service -Name Dnscache –force command returns the following error: Collection was modified; enumeration operation may not execute).
Continue reading “How to Enabling DNS over HTTPS (DoH)”

How to Enable Google Toolbar in Firefox 12 to 18


Google has stopped supporting the Toolbar for Firefox. There will be no further updates or security fixes from Google. This tutorial only enables the Google Toolbar on Firefox. If you feel like breaching your computer’s security, do not follow this guide.

Mozilla released the Firefox 12 few days ago and very close to release official version 13. This tweak still works, therefor, you still can enable Google Toolbar on Firefox 12 and 13.

Firefox, the favorite browser for most of the people released the Firefox 12 few days ago. Since it is a major version upgrade, some of the Plugins, Addons and Extensions went incompatible. Google Toolbar for Firefox is one of them.

Firefox 13, based on Gecko 13.0 is currently in beta stage and will be released on June 5, 2012. Firefox 14, based on Gecko 14 and Firefox 15, based on Gecko 15 is under Aurora and Nightly Channels and will be on upgrade channels on the same day. My Tutorial works for Firefox 11, Firefox 12, Firefox 13, Firefox 14 and Firefox 15.
Continue reading “How to Enable Google Toolbar in Firefox 12 to 18”